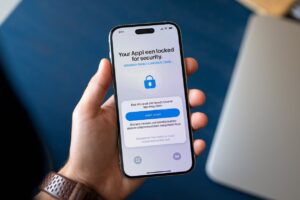
Skip Software Updates When Setting Up New iPhone can be an exhilarating experience, but the prompt for a software update can sometimes put a damper on things. If you prefer to skip the update during setup, whether due to limited internet access, wanting to customize your settings first, or simply not wanting to wait, this guide will provide you with accurate, step-by-step instructions.
Understanding Software Updates
Apple regularly releases software updates to improve performance, enhance security, and fix bugs. While it’s generally a good idea to keep your device updated, there are legitimate reasons to delay the update, particularly during initial setup. Skipping the update allows you to start using your device immediately, with the option to update later when it’s more convenient.
Prerequisites for Setup
Before you begin the setup process, ensure you have:
- A new iPhone or one that has been factory reset.
- Access to Wi-Fi or a cellular network (optional, but recommended).
- Your Apple ID and password handy (if applicable).
- A backup of your old device (if you’re transferring data).
Step-by-Step Guide to Skip Software Update
Step 1: Power On Your New iPhone
To get started, press and hold the side button until the Apple logo appears. This indicates that your iPhone is booting up. Once you see the “Hello” screen, you’re ready to proceed.
Step 2: Select Your Language and Region
Swipe up or press the Home button (depending on your model) to move forward. Choose your preferred language and region, as this will affect your keyboard, date formats, and other regional settings.
Step 3: Connect to Wi-Fi (Optional)
You’ll be prompted to connect to a Wi-Fi network. Here, you have two options:
- Connect to a Wi-Fi network: Select a network and enter the password to connect.
- Use Cellular Data: If you prefer not to connect to Wi-Fi, you can skip this step if your cellular plan allows it.
If you choose not to connect to Wi-Fi, you may see a message indicating that certain features will be unavailable.
Step 4: Set Up Face ID or Touch ID
After connecting to Wi-Fi (or choosing not to), you’ll be prompted to set up Face ID or Touch ID. You can choose to set this up now or select “Set Up Later in Settings.” This step is optional, and skipping it can save you time during the initial setup.
Step 5: Create a Passcode
You will then be asked to create a passcode. This is crucial for securing your device, but if you wish to skip this step, tap on “Passcode Options” and select “Disable Passcode.” Keep in mind that disabling your passcode reduces your device’s security.
Step 6: Restore or Transfer Your Information
At this stage, you’ll see options for restoring or transferring data. You can:
- Restore from iCloud Backup
- Restore from Mac or PC
- Transfer directly from another iPhone
- Set Up as New iPhone
To bypass the software update, select “Set Up as New iPhone.” This choice allows you to start fresh without transferring data that might trigger an update.
Step 7: Sign in with Your Apple ID
You’ll now be prompted to sign in with your Apple ID. If you want to skip this, look for the option that says “Forgot Password or Don’t Have an Apple ID?” and choose “Set Up Later in Settings.” This will allow you to continue without linking your Apple ID right away.
Step 8: Agree to Terms and Conditions
Next, you’ll need to agree to Apple’s terms and conditions. Make sure to read through them, and then tap on “Agree” to proceed.
Step 9: Skip Software Update Prompt
If a software update prompt appears during the setup process, look for an option to “Skip Update” or “Not Now.” If you don’t see it, proceed with the setup anyway, as you can update your software later.
Step 10: Customize Your Settings
Once you reach the home screen, you can begin customizing your iPhone. Open the Settings app to adjust notifications, privacy settings, display preferences, and more. This customization allows you to tailor your device to your liking before applying any updates.
Step 11: Update Software Later
To update your iPhone at a more convenient time, follow these steps:
- Open the Settings app.
- Scroll down and tap on General.
- Select Software Update.
- Follow the prompts to download and install any available updates.
Conclusion
Skipping a software update during the setup of your new iPhone is a straightforward process that allows you to start using your device without delay. While keeping your device updated is important for security and functionality, there are times when you might prefer to postpone the update.
By following this step-by-step guide, you can ensure a smooth setup experience. Remember to check for updates later to enjoy all the latest features and enhancements from Apple. Whether you’re a seasoned iPhone user or new to the Apple ecosystem, this guide will help you navigate the setup process with ease. Happy iPhone-ing!


1 thought on “How to Skip Software Updates When Setting Up New iPhone: A Quick Guide”
Pingback: Spatial Audio Unavailable: How to Fix the Issue on Your Device - Tech Spectrum